Keep your dependencies up to date with Dependabot on GitLab
Small regular dependency updates are much easier than rare huge updates. Learn how to automate this process and keep your dependencies up to date

Hey 👋 I'm a Frontend Developer with Backend experience and UX/UI skills. I love everything about Developer Experience and I'm always trying to create the best environment around me and make my teammates happy!
Motivation
Developers usually don’t care about updating their dependencies (especially small packages). And really it makes sense if the lifetime of your project is small enough to keep them without updates. You know what - forget about sense - developers often aren't concerned with updating their dependencies, and you (and me) too.
But then… New version of your favorite library is released. And it brings cool new features you want to use.
Of course, you argue with your manager that keeping dependencies up to date is critical for the growth of the project (so important that this is the first time you are trying to update something since the beginning of the project), and he finally gives you time to update it.
You’re trying to install it… You need to update one more package, and one more and few more… You end up with the fact that the whole project must be updated.
After a week of updates, it’s working. And you’re so tired because of almost endless updates and breaking changes that you decide that you'll never update the project again (mobile developers typically choose to rewrite projects from scratch next time).
People usually overestimate updates because of the first painful experience and rather commit to “Never again” instead of trying to simplify the process.
Small incremental and scheduled updates can reduce pain and frustration to zero, as well as open many opportunities for the project to grow. You don’t need to keep your eye on every single dependency from your project - there is a tool for it.
What is Dependabot
Dependabot helps you keep your dependencies up to date. Every day, it checks your dependency files for outdated requirements and opens individual PRs for any it finds. You review, merge, and get to work on the latest, most secure releases.
So, this is the tool that can analyze dependencies of your project and create pull requests with new versions of them. No need to keep your eye on every single package used in your project - it will be enough to review PRs from time to time.
And Dependabot is a unique feature exclusive to GitHub and owned by Microsoft… And our projects are hosted on GitLab… Stop crying! (the author also cried when he first heard it). Dependabot is open-sourced, so great minds created a fork with support of GitLab and JetBrains. And it’s working!
There are two main repos available on GitLab and for projects hosted on GitLab. dependabot-gitlab - main fork with all the heavy lifting of original Dependabot project. It should be hosted somewhere to work, so there is one more repo named dependabot-standalone - no hosting required to analyze your project dependencies and that is what we’re going to use.
This guide will help you to configure it - just follow the steps below.
Create GitLab personal access token
Let’s start from creating your personal access token. This token is required for our Dependabot pipeline, so it can read (analyze dependencies) and write (create merge requests) data in our projects. Go to access tokens in your profile settings.

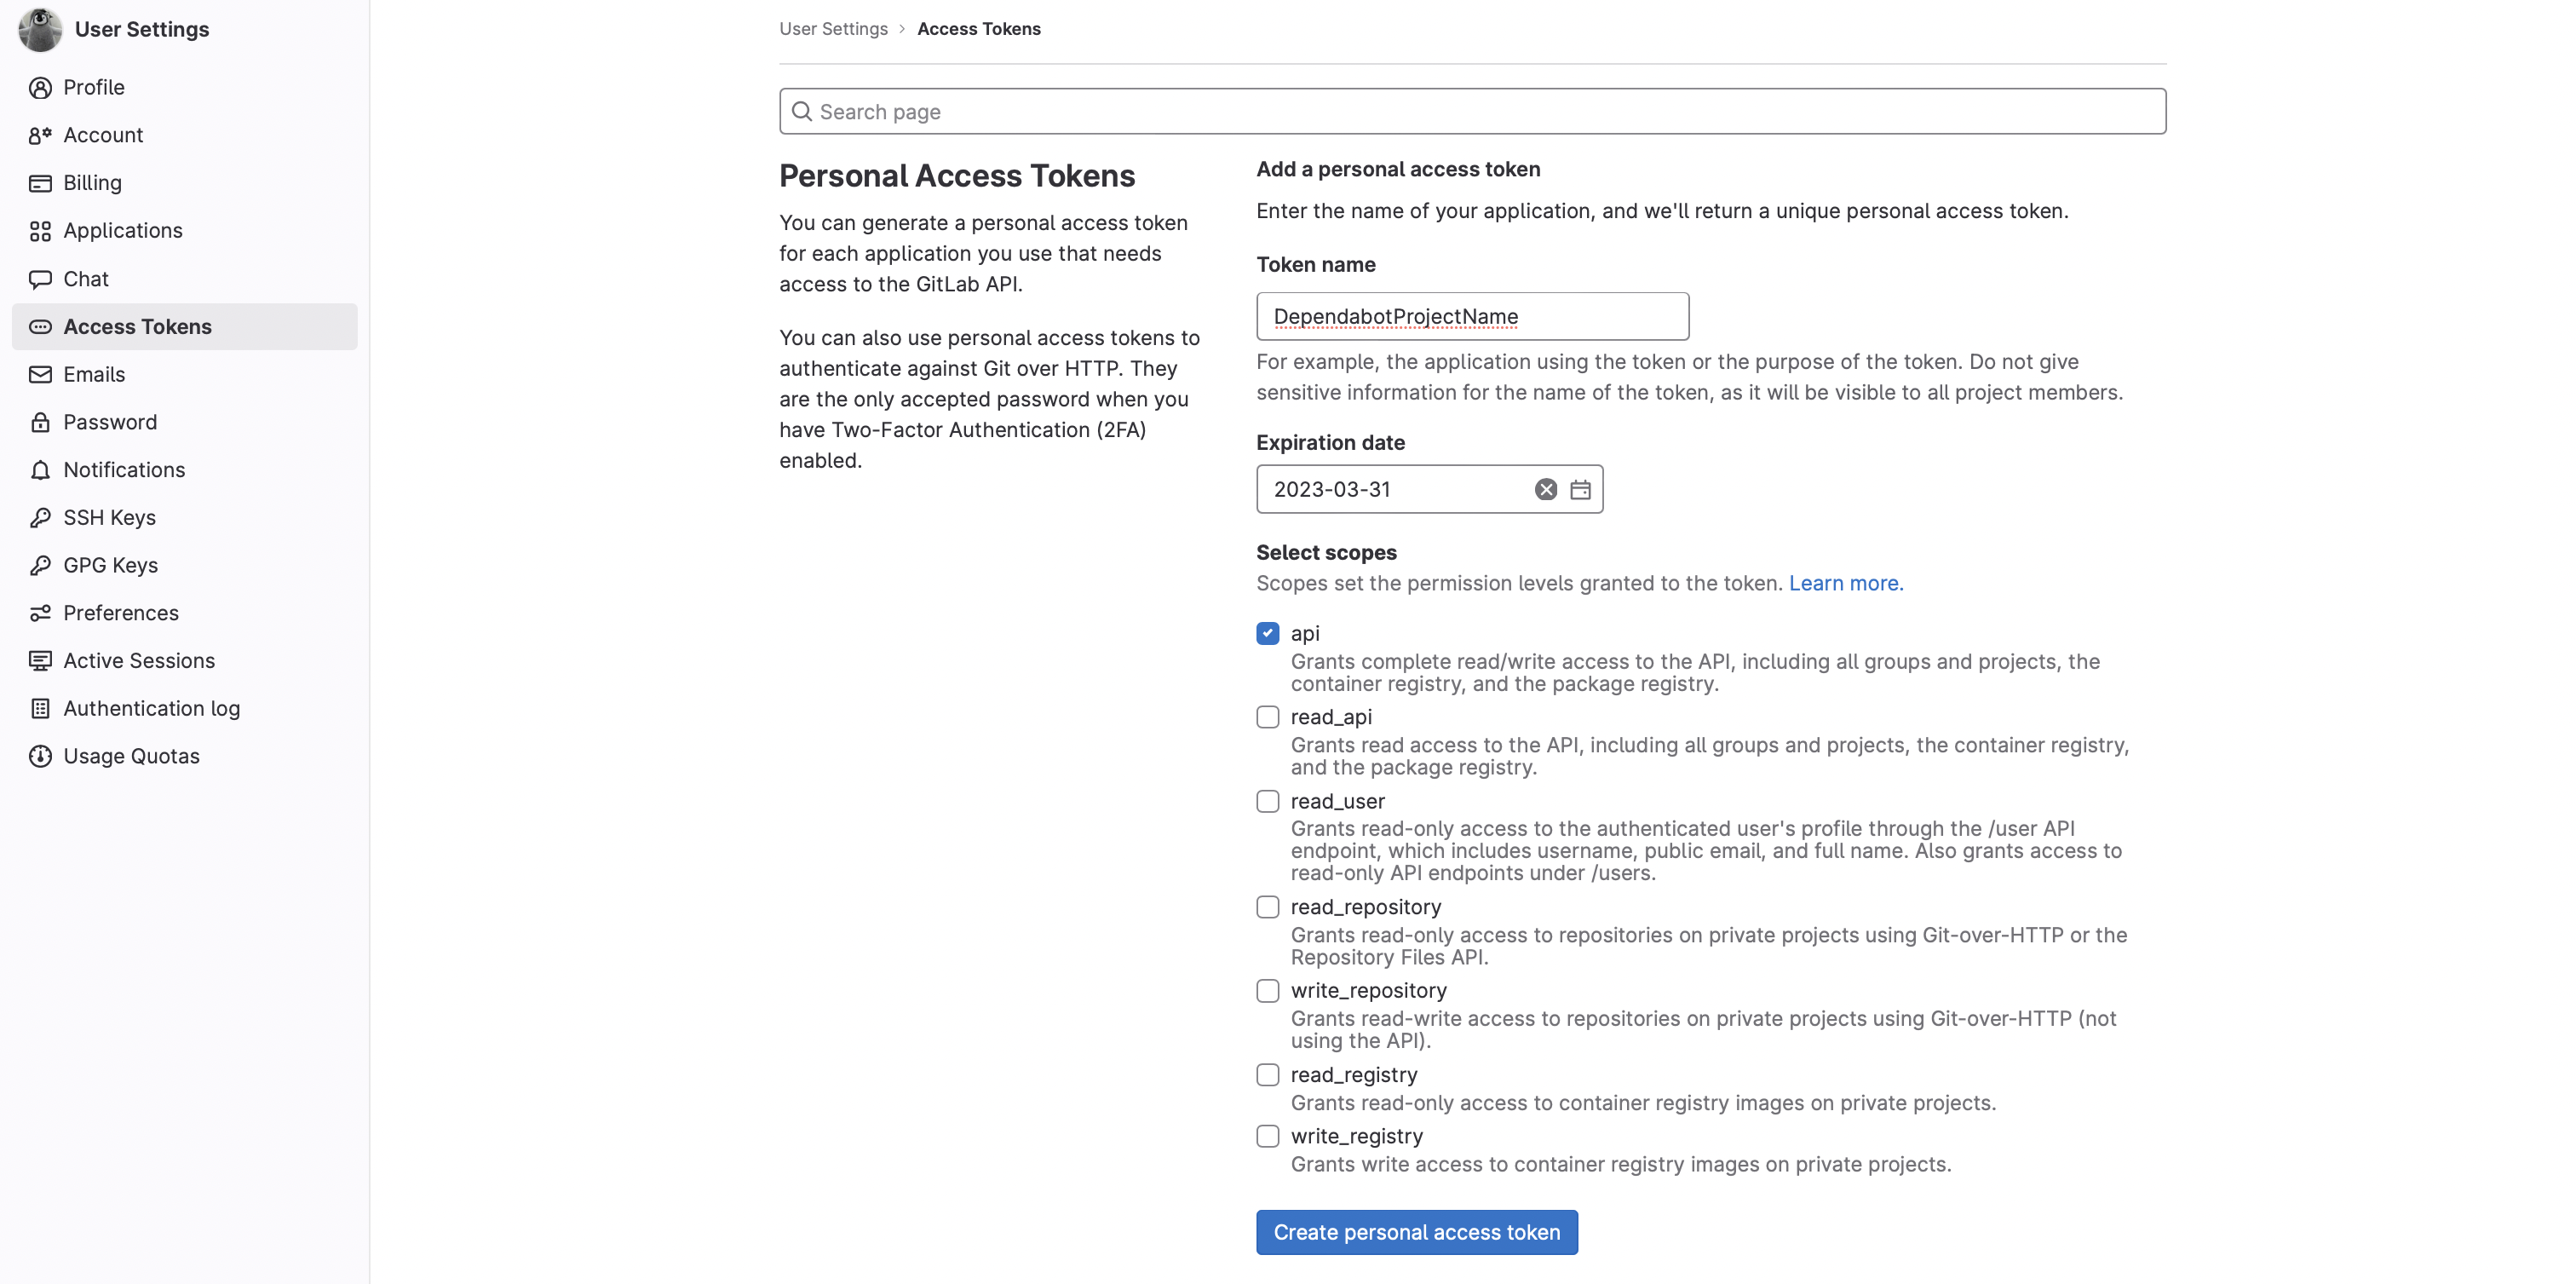
To create an access token, you need to enter name, choose expiration date and select scope.
The name must start with Dependabot and be prefixed with your project name. Be specific with naming here and do not use one token for multiple projects - to avoid situations where you decide to revoke a token and several projects are broken.
One token must be used only for one project.
DependabotMagicRemote, DepedabotOculus, DependabotAwesomeHabits - these are all examples of good names.
The expiration date is not important here, the admin can always revoke your token, but it would be better to specify an expiration date to prevent potential security issues. This adds some extra token management effort, but it's a fair trade-off.
Scope defines permission levels and how many things token owners can do. All that Dependabot needs it read and write to our projects, so choose api scope.
Compare what you have to the image below.
Create personal access token button should be active now. Click on it, and you should see your new access token at the top of the page.
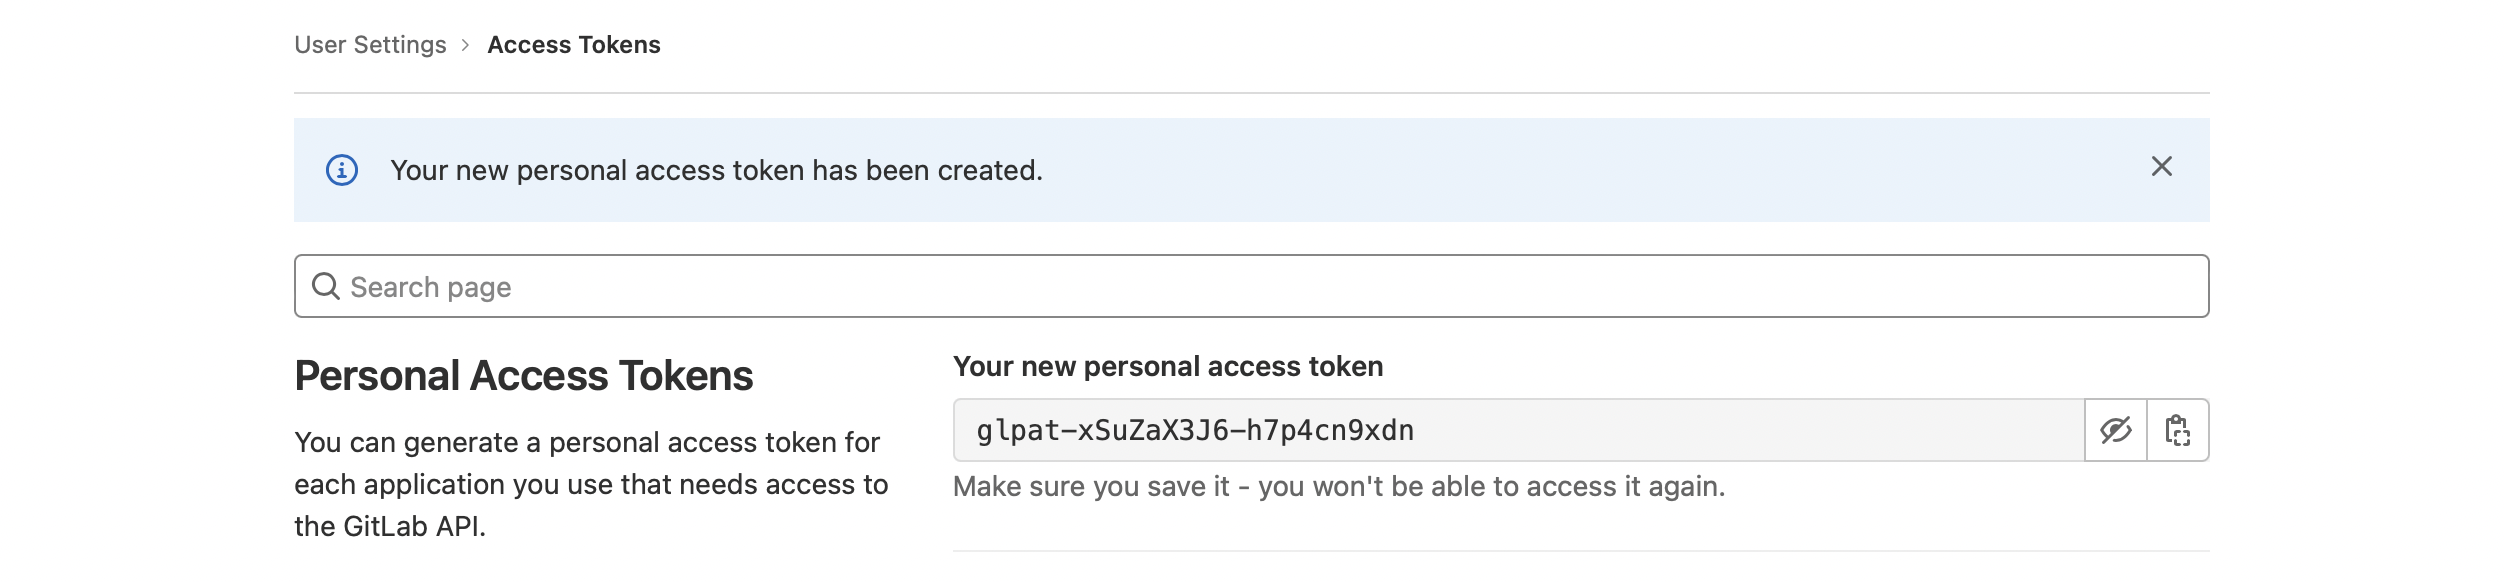
Copy and save it for now - we will add it as an environment variable to our project repository.
Create GitHub personal access token
This token isn’t required for the pipeline to work, but because GitHub API is used under-the-hood of Dependabot at some point of time you may reach API rate limit. And the solution here is to start using authenticated requests that are supported and do not require much effort to configure. The one and only thing we need is to create a GitHub personal access token.
Open GitHub Developer settings and choose Personal access tokens in the left menu. There are two options available - Fine-grained tokens (in beta at the time of writing) and Tokens (classic). To authenticate requests, we need to use classic tokens, so click on them.

Click on generate new token button and pick generate new token (classic) from the dropdown. Now you will see some details you can configure before creating a token including note, expiration period and scopes our token will have access to.
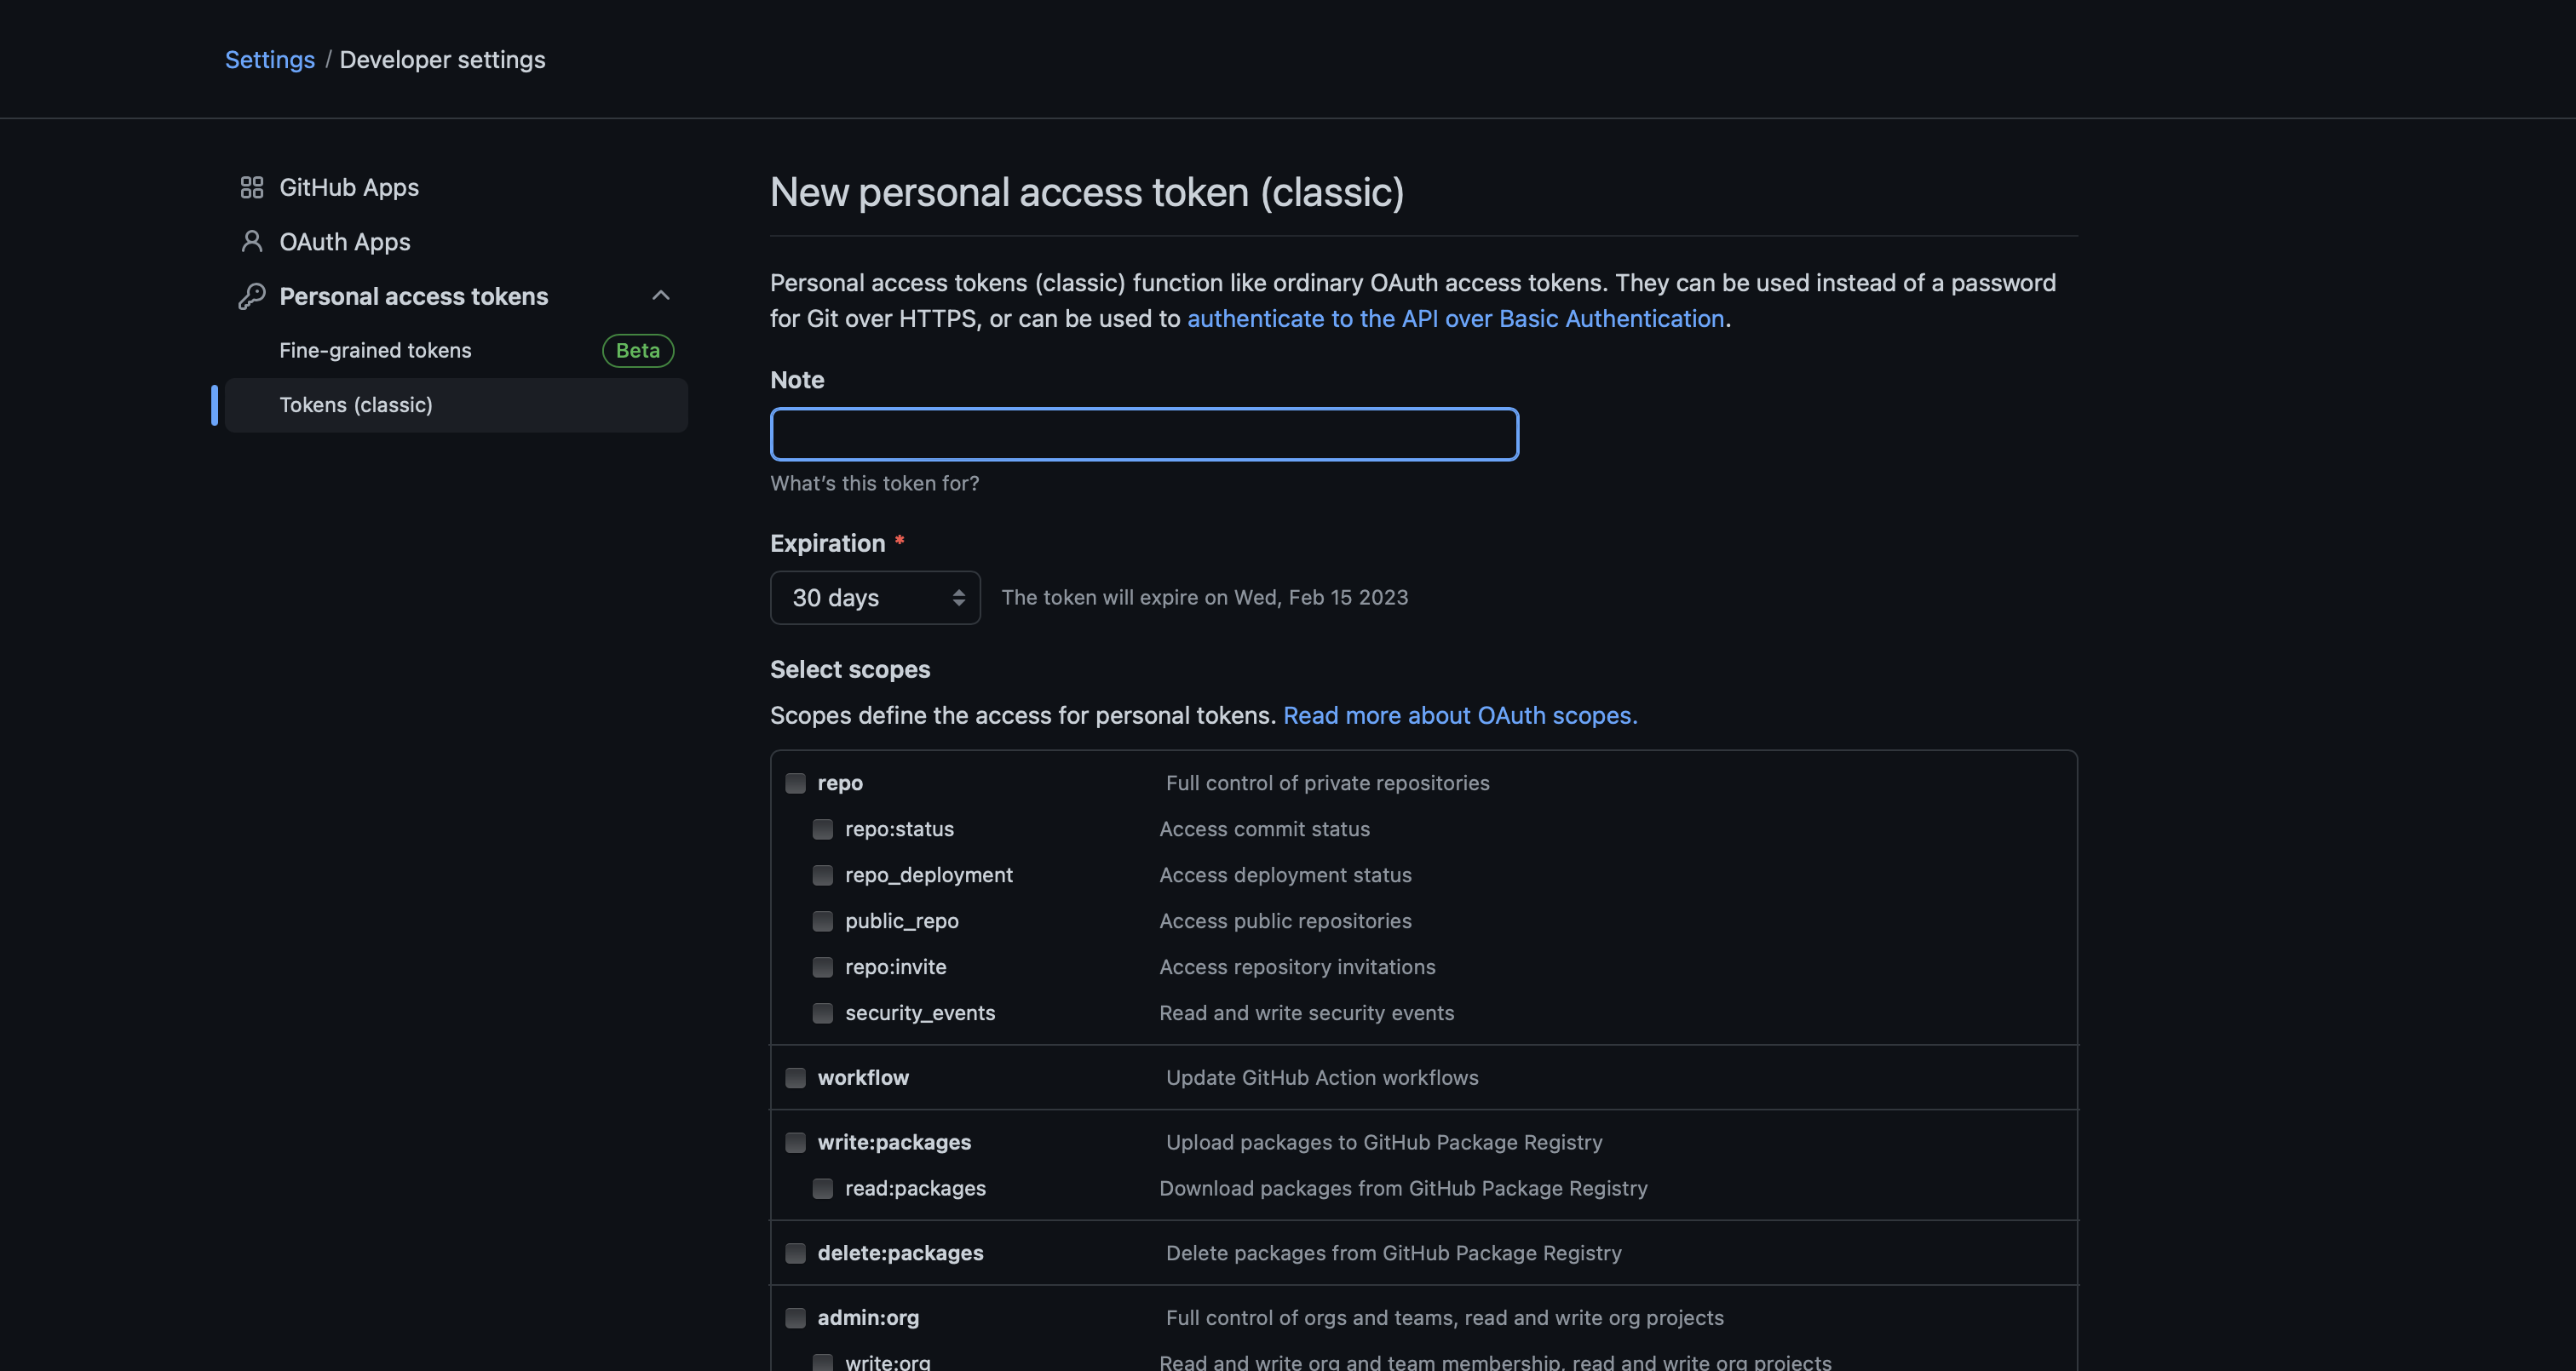
Note should match the name of the GitLab access token (e.g. DependabotMagicRemote, DepedabotOculus, DependabotAwesomeHabits), expiration date is up to developer here, but it is recommended not to choose No expiration. And for scopes you just need to tick repo checkbox, so our token will have access to repositories and information like deployment and commit statuses.

Make sure that you have everything configured like in the screenshot above and click on the Generate token button on the bottom of the page.

Copy the token and save it for later - you will need it in the next step.
Add environment variables
To simplify the process of managing tokens and prevent some possible issues when for example account owning the tokens for deleted or deactivate leading to broken pipeline it will be great to have admin account not associated with any people and create tokens from this account.
Our GitLab access token will be used by our Dependabot pipeline to analyze dependencies and raise merge requests if some of them can be updated. Go to your project repository and navigate to Settings → CI/CD.
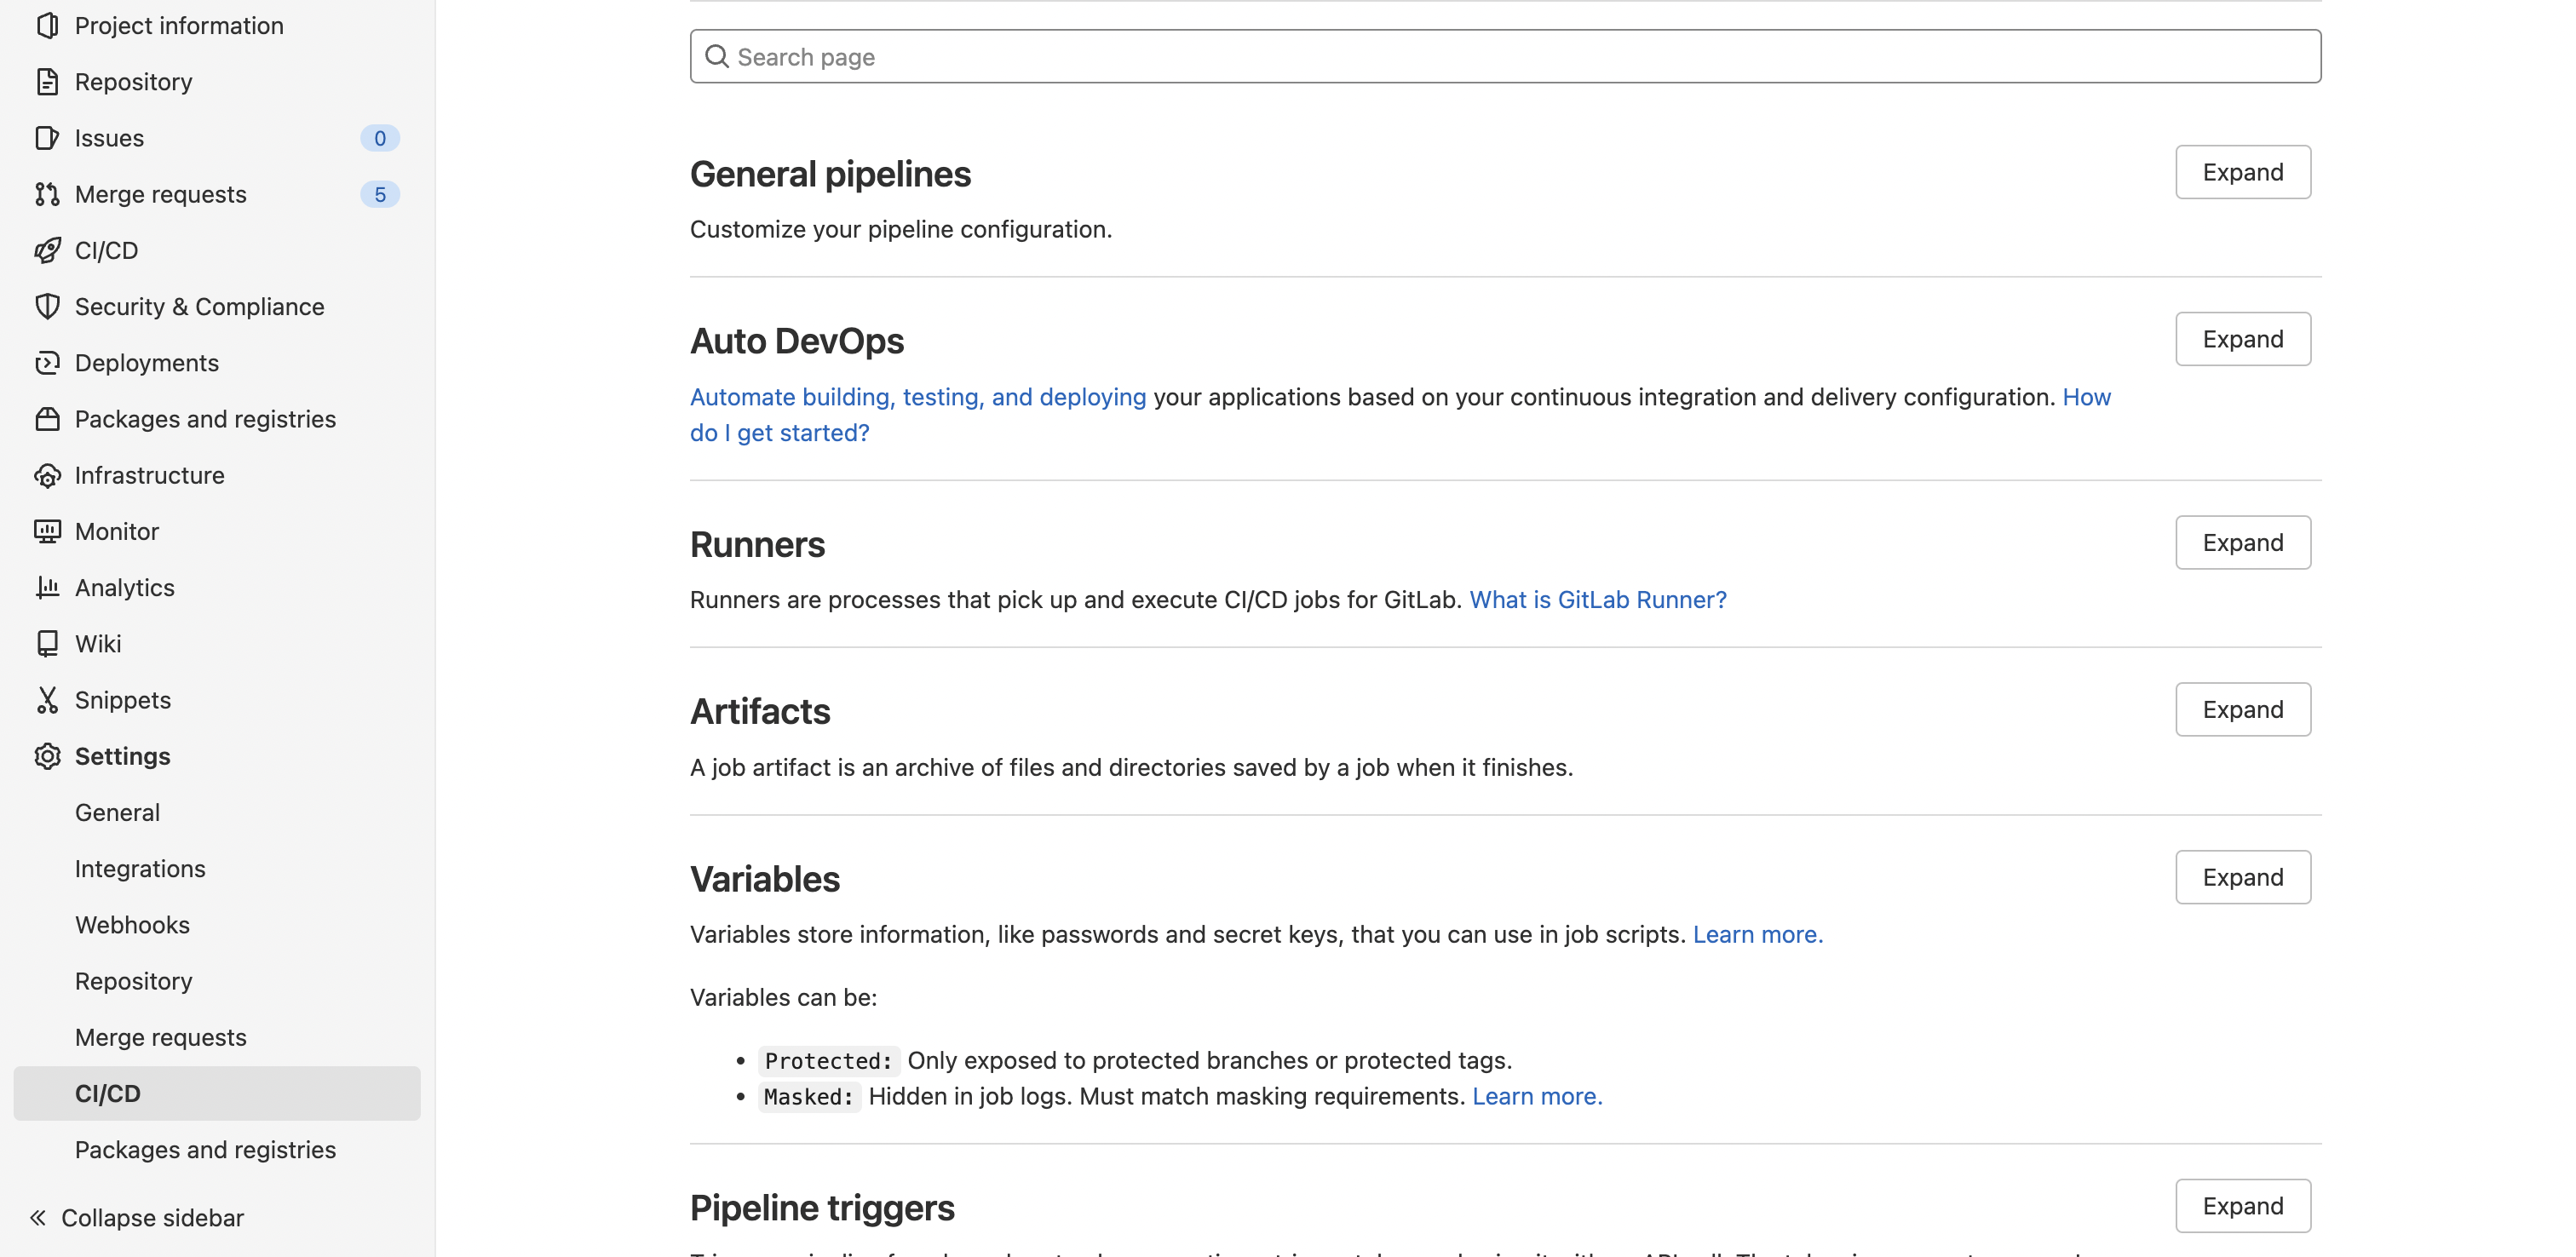
Find variables section and expand it - you may see some already added variables, but we are interested in Add variable button - click on it.

You should see add variable modal now. Key is like a name of the variable - we need to use SETTINGS__GITLAB_ACCESS_TOKEN here. Value is your personal access token you created earlier. No changes for type and environment scope required.
Protect and mask flags are optional.
Protect is selected by default, and it means that your environment variable will be available only in pipelines running from protected branches and tags. Most of the time you want to scan dependencies in your most updated branch (e.g., dev or master) and usually, it's not protected, so let's uncheck this flag.
With mask checked, actual value, will be hidden in different logs. It can improve safety and privacy, but it also becomes harder to debug pipeline issues (e.g., access token can be revoked, but you cannot check actual value because it’s masked), so let’s leave it unchecked.
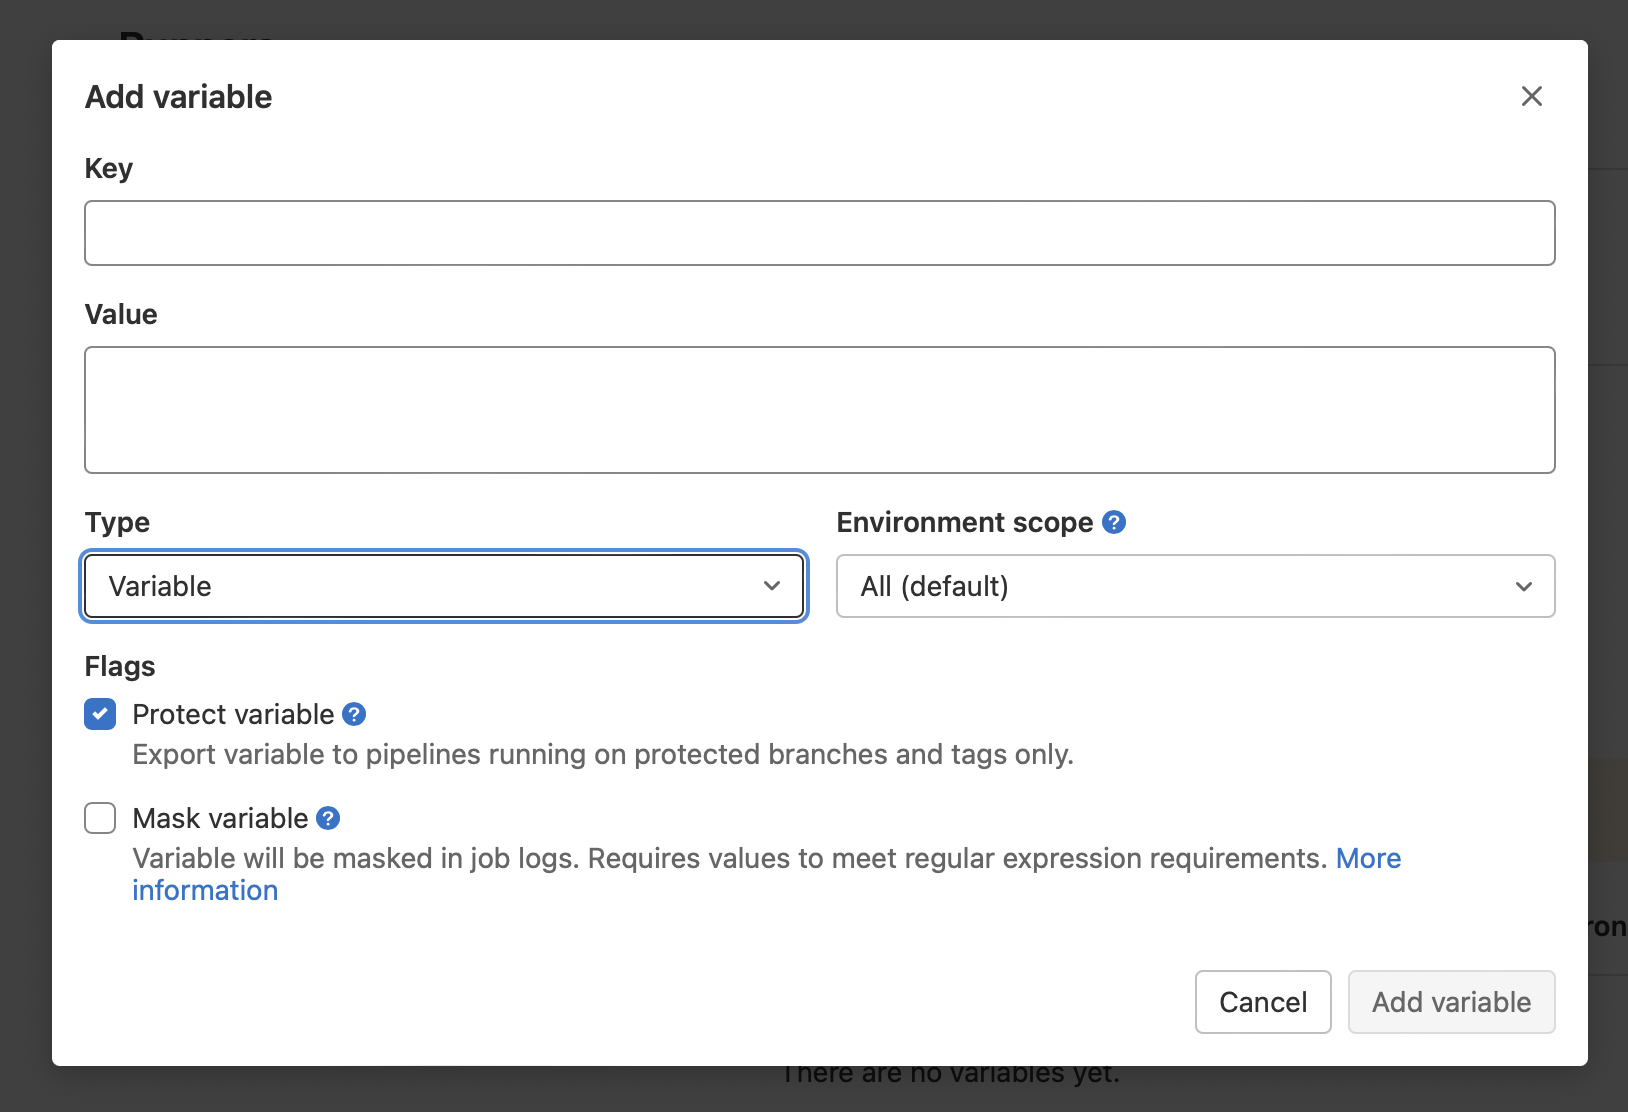
Add variable button is active now - click on it.

Personal access token that we created in GitHub is needed in order for Dependabot to authenticate requests to GitHub API. Create one more environment variable the same way you just did for GitLab token and name it as SETTINGS__GITHUB_ACCESS_TOKEN with GitHub access token used as a value.
We’re done with all these tokens - one that is left is to add schedule.
Add schedule
We don’t really want our Dependabot pipeline being executed after every push or merge. Weekly updates is everything we need (you can go daily, buy you’ll be quickly tired of endless updates and you merge requests list is going to grow faster than you can review it). So let’s add schedule!
Go to CI/CD → Schedules and click on new schedule button. You should see the UI as on the image below.

Simply put dependabot as a description, and it'll be completely clear for everyone. For interval, you can choose every week if Wednesday works for you. The day of the week isn't important, but try to turn the process of reviewing and merging dependency updates into a habit - with a habit it will be much easier and faster. A fixed day and time will help you (e.g., every Friday at 12 am I'll review merge requests from Dependabot and merge them). I suggest setting the schedule to Monday morning, so you can review and merge them though the day, and developers will work with updated dependencies for the rest of the week.
Crontab tool can be helpful for creating custom schedules.
Timezone is optional.
Target branch should be your default branch.
At the end, add SCHEDULE_NAME variable with value equal to dependabot. It will be used to determine on which schedule our pipeline should be executed.
Compare your schedule to the image below.
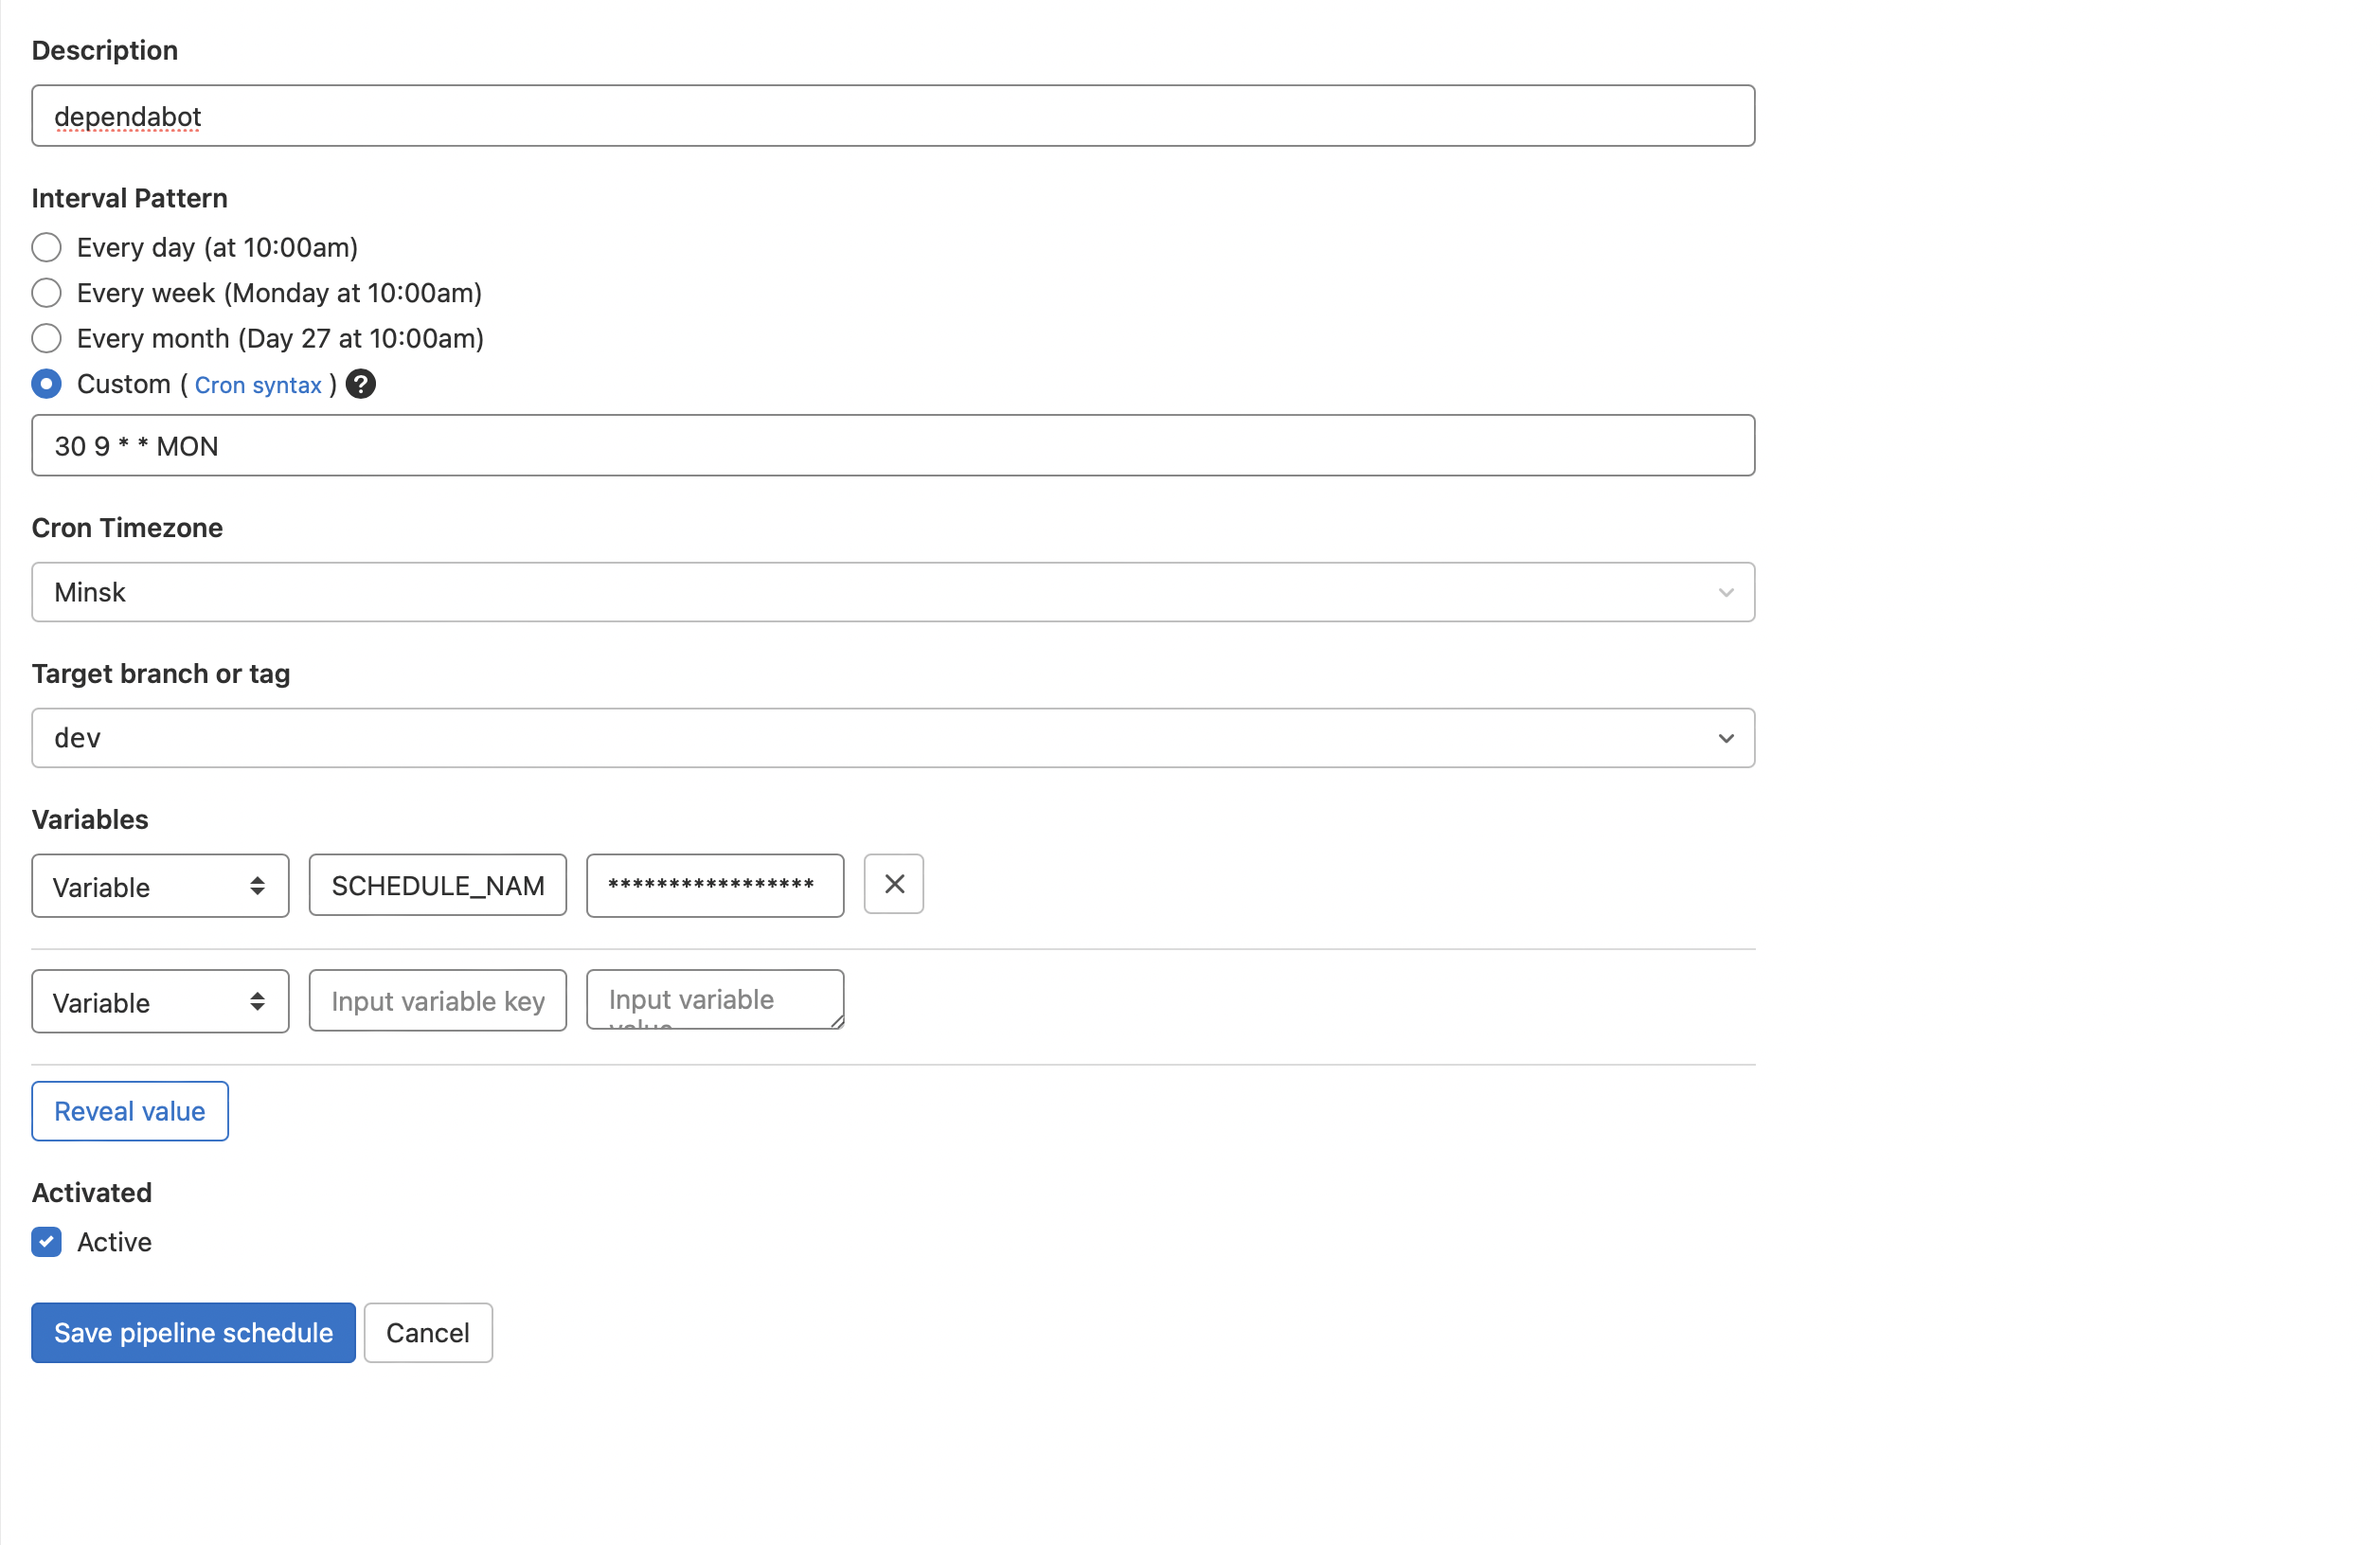
If everything looks similar, click on Save pipeline changes button - now we’re finally moving to our Dependabot configuration.
Dependabot configuration
Open the project in your IDE and create gitlab folder. Add dependabot.yml file to the folder you just created. Copy and paste content from the snippet below.
version: 2
updates:
  - package-ecosystem: npm
    directory: /
    schedule:
      interval: weekly
All you need to specify is package-ecosystems and configurations for them. Usually, you’ll have only one npm (it will also check yarn) package-ecosystem, but here is the list of all available ecosystems.
Directory is required, and it defines the location of the package manifests (e.g., package.json) for each package manager.
Schedule is used to specify how often and when Dependabot is going to check for version updates. Interval is the only required field for schedule - available values are daily, weekly, and monthly, so it will be executed every day, week, or month. Optionally, you can set the day for weekly updates (by default, it will check for new versions on Monday). Time and timezone are also optional.
GitLab pipeline
Create .gitlab-ci.yml in the root of your project and open it. Just copy and paste content of the snippet below. That’s all the magic. It’s not significant to understand these lines to use Dependabot in your project, but it will load docker-image of dependabot-standalone, set all required variables and execute Dependabot update command based on schedule from Dependabot config.
.dependabot:
  image:
    name: docker.io/andrcuns/dependabot-gitlab:0.11.0
    entrypoint: [""]
  variables:
    GIT_STRATEGY: none
    PACKAGE_MANAGER: $CI_JOB_NAME
    RAILS_ENV: production
    SETTINGS__GITLAB_URL: $CI_SERVER_URL
    SETTINGS__STANDALONE: "true"
  before_script:
    - cd /home/dependabot/app
  script:
    - bundle exec rake "dependabot:update[$CI_PROJECT_NAMESPACE/$CI_PROJECT_NAME,$PACKAGE_MANAGER,/]"
  rules:
    - if: '$CI_PIPELINE_SOURCE == "schedule" && $SCHEDULE_NAME == "dependabot
Last thing you need is to create jobs for every package-ecosystem you used in dependabot.yml. Check out the example below - you just need to extend the .dependabot configuration above.
npm:
  extends: .dependabot
An example of the final pipeline is shown in the snippet below:
.dependabot:
  image:
    name: docker.io/andrcuns/dependabot-gitlab:0.11.0
    entrypoint: [""]
  variables:
    GIT_STRATEGY: none
    PACKAGE_MANAGER: $CI_JOB_NAME
    RAILS_ENV: production
    SETTINGS__GITLAB_URL: $CI_SERVER_URL
    SETTINGS__STANDALONE: "true"
  before_script:
    - cd /home/dependabot/app
  script:
    - bundle exec rake "dependabot:update[$CI_PROJECT_NAMESPACE/$CI_PROJECT_NAME,$PACKAGE_MANAGER,/]"
  rules:
    - if: '$CI_PIPELINE_SOURCE == "schedule" && $SCHEDULE_NAME == "dependabot"'

npm:
  extends: .dependabot
Commit and push your dependabot.yml and .gitlab-ci.yml and that’s it. Now you have Dependabot configured and ready to work.
How it works
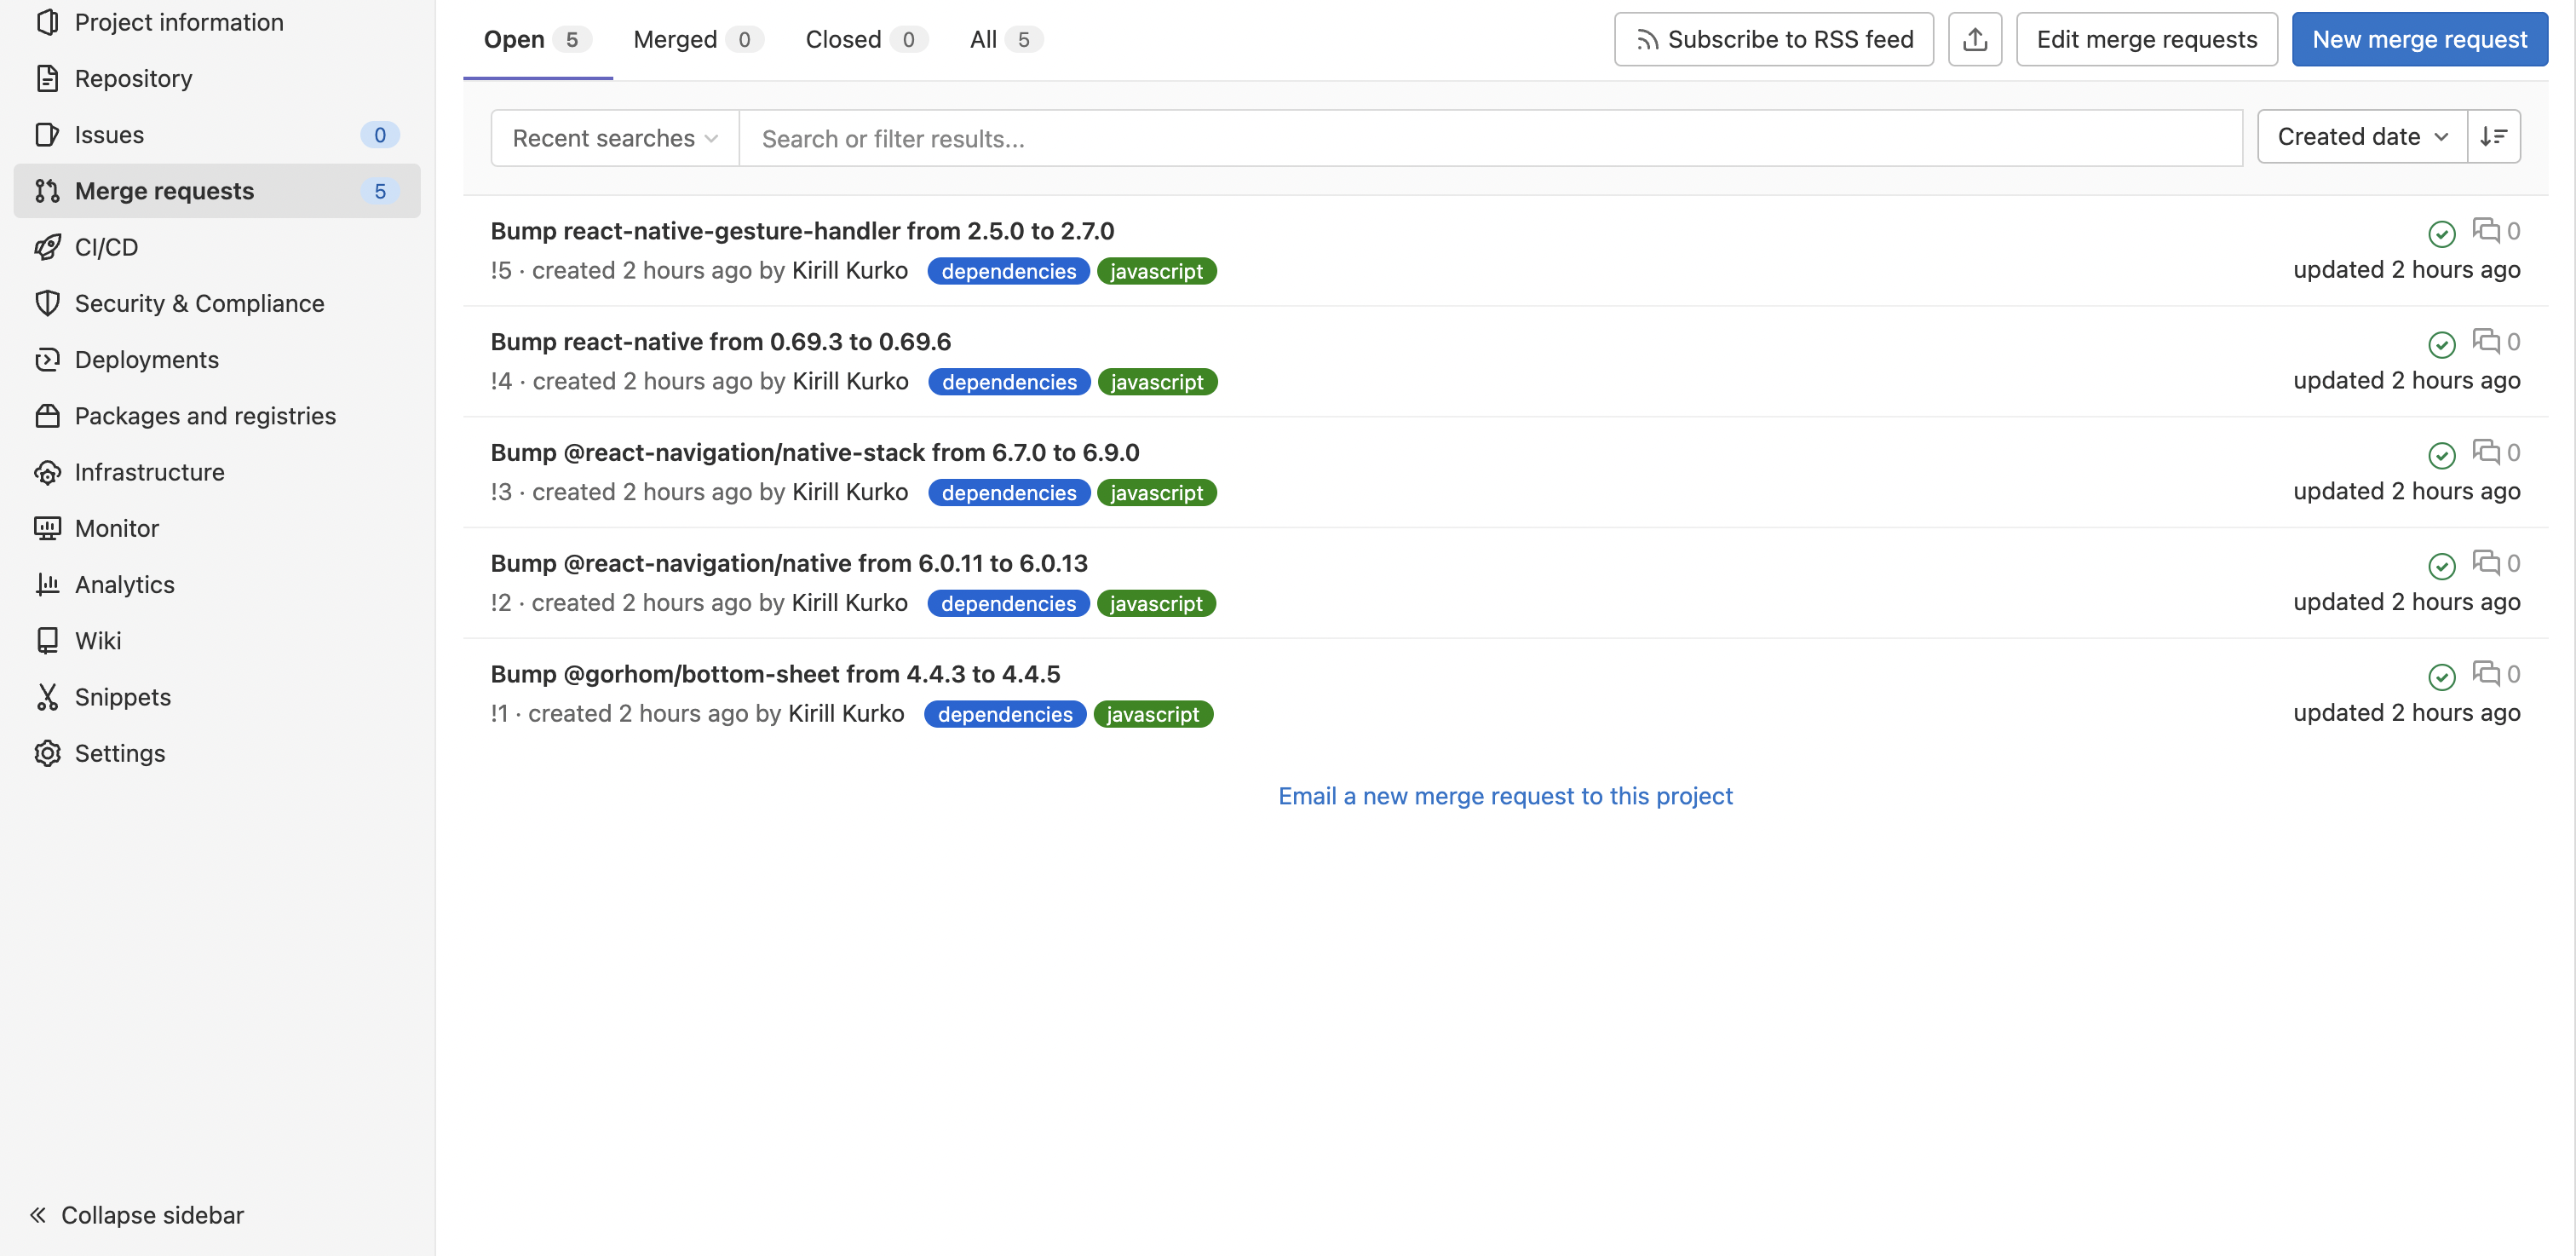
You will see merge requests with updates to your project dependencies on configured schedule. All merge requests will have changelog of a new version.
There is no guarantee that new dependency is safe, and it's not going to break your project. It works well with CI/CD, but if you don't have one, checkout the branch and test it manually.
Basic setup is done and that’s enough for most project, but there are a lot of configuration options for Dependabot. Check links section to learn more.
Links
dependabot-gitlab repository - quite a lot of info in the readme of the project


